
A location in TruckCharge Connect is the digital representation of a physical charging site, such as a depot, yard, or parking area.
Locations are the foundation for:
- Charger assignment
- Pricing
- Visibility in charging apps and maps
- Discovery by fleet managers in Connect
This guide explains how to create the location shell - the required first step before configuring access or adding chargers.
How Locations Are Used
Depending on how your infrastructure is set up, you can:
- Manage all chargers under one location, or
- Create multiple locations at the same physical address
Common reasons to create multiple locations include:
- Different pricing for different chargers
- Separating AC and DC chargers
- Different access rules for different user groups
The settings applied at location level directly influence how:
- Drivers see the site in charging apps
- Fleet managers find the site when searching for chargers
Location Creation: Overview of the Flow
Creating a location is a multi-step process:
- Create the location shell
- Configure visibility and access
- Add chargers to the location
- (Optional) Enable load balancing
This guide covers step 1: creating the location shell.
Step 1: Start the Location Creation Flow
- Navigate to Locations
- Click the “+” icon to create a new location
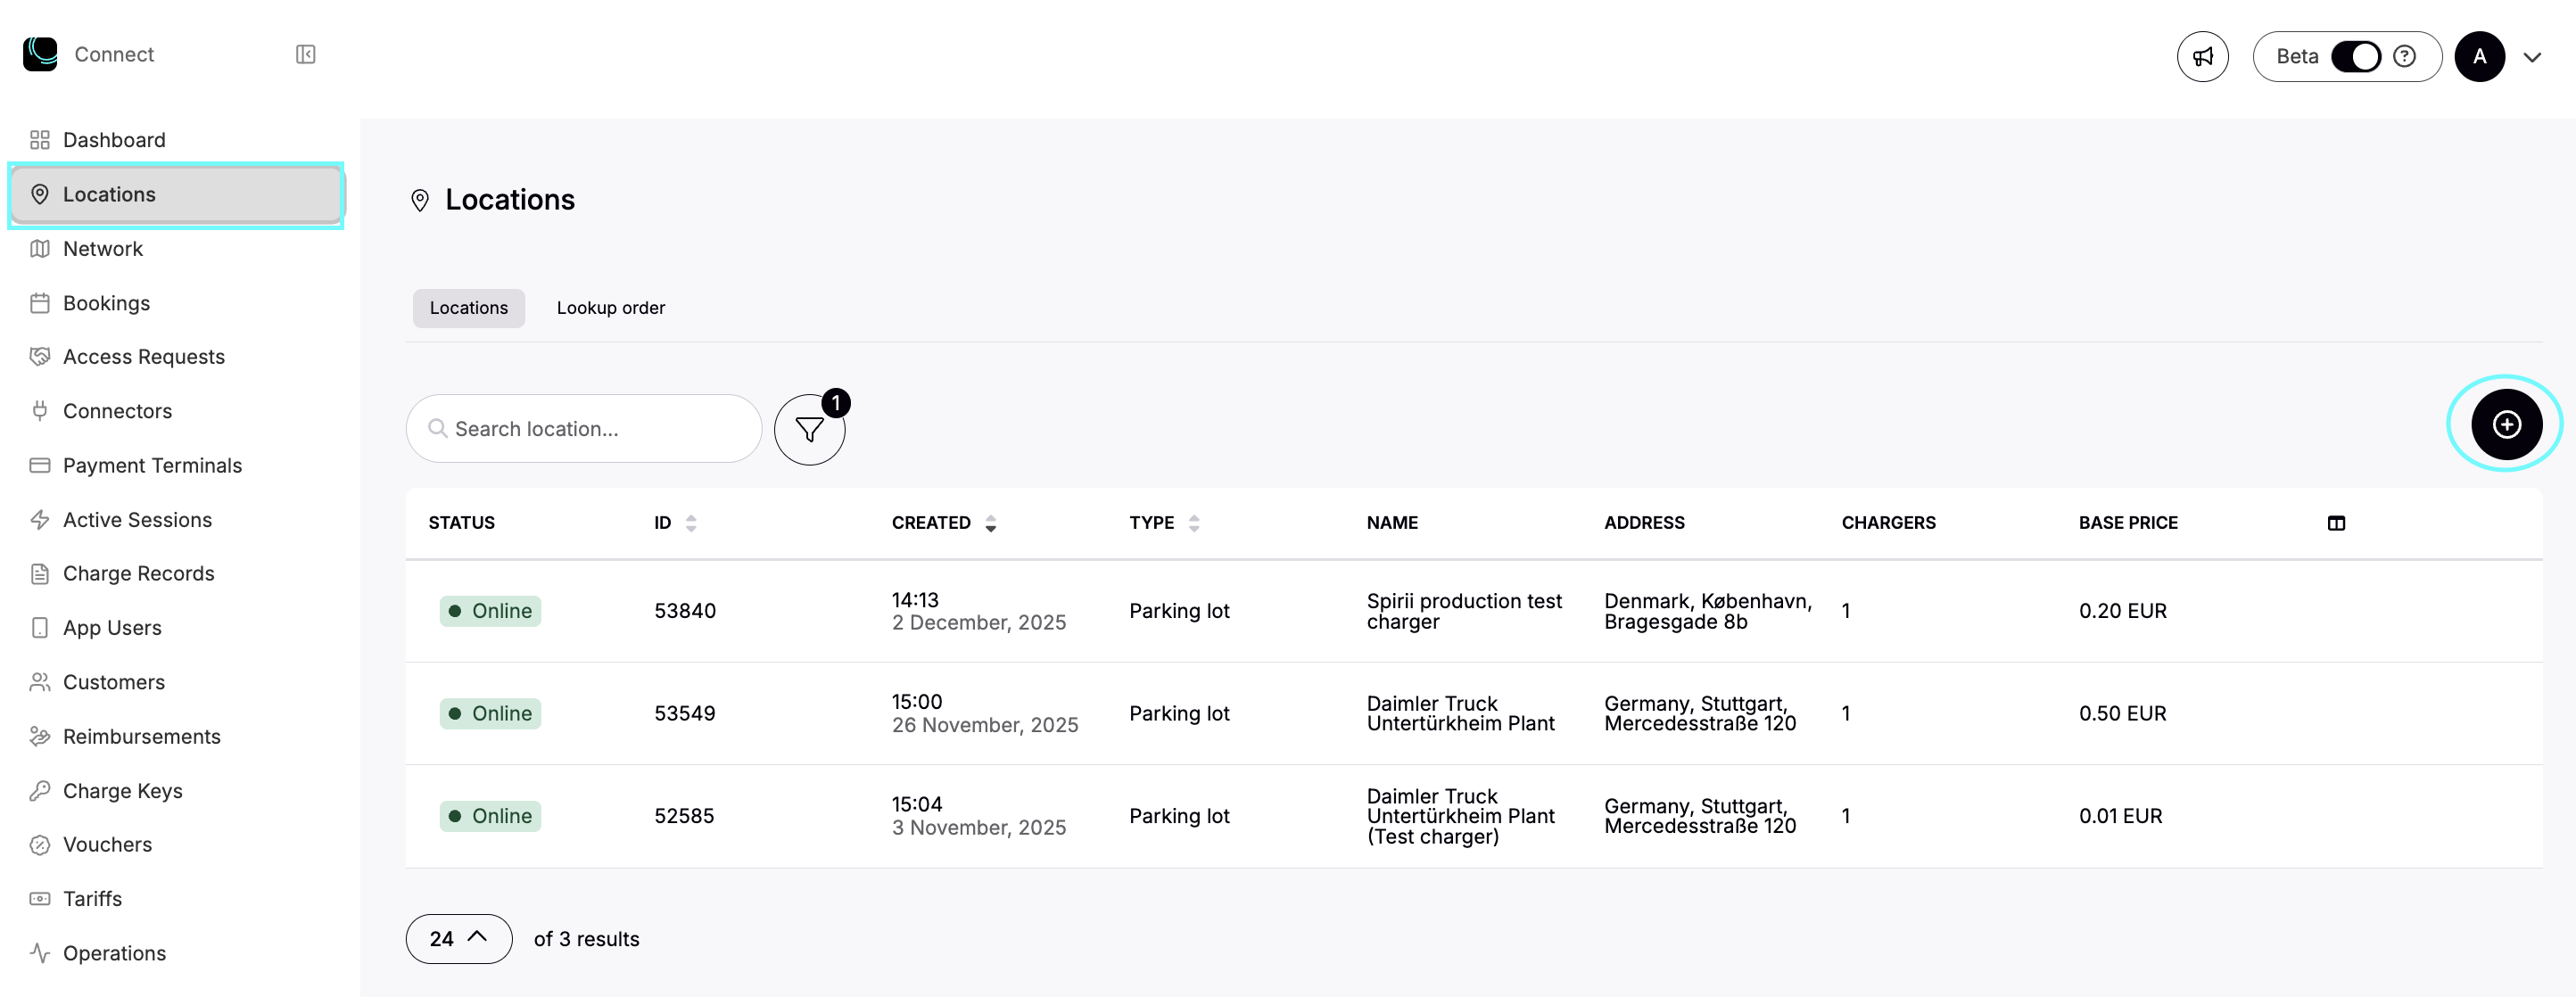
This opens the location creation flow.
Step 2: Name the Location
Choose a name that clearly represents the site.
The location name is used:
- Internally in TruckCharge Connect
- In charging apps and maps (depending on the location's visibility settings)
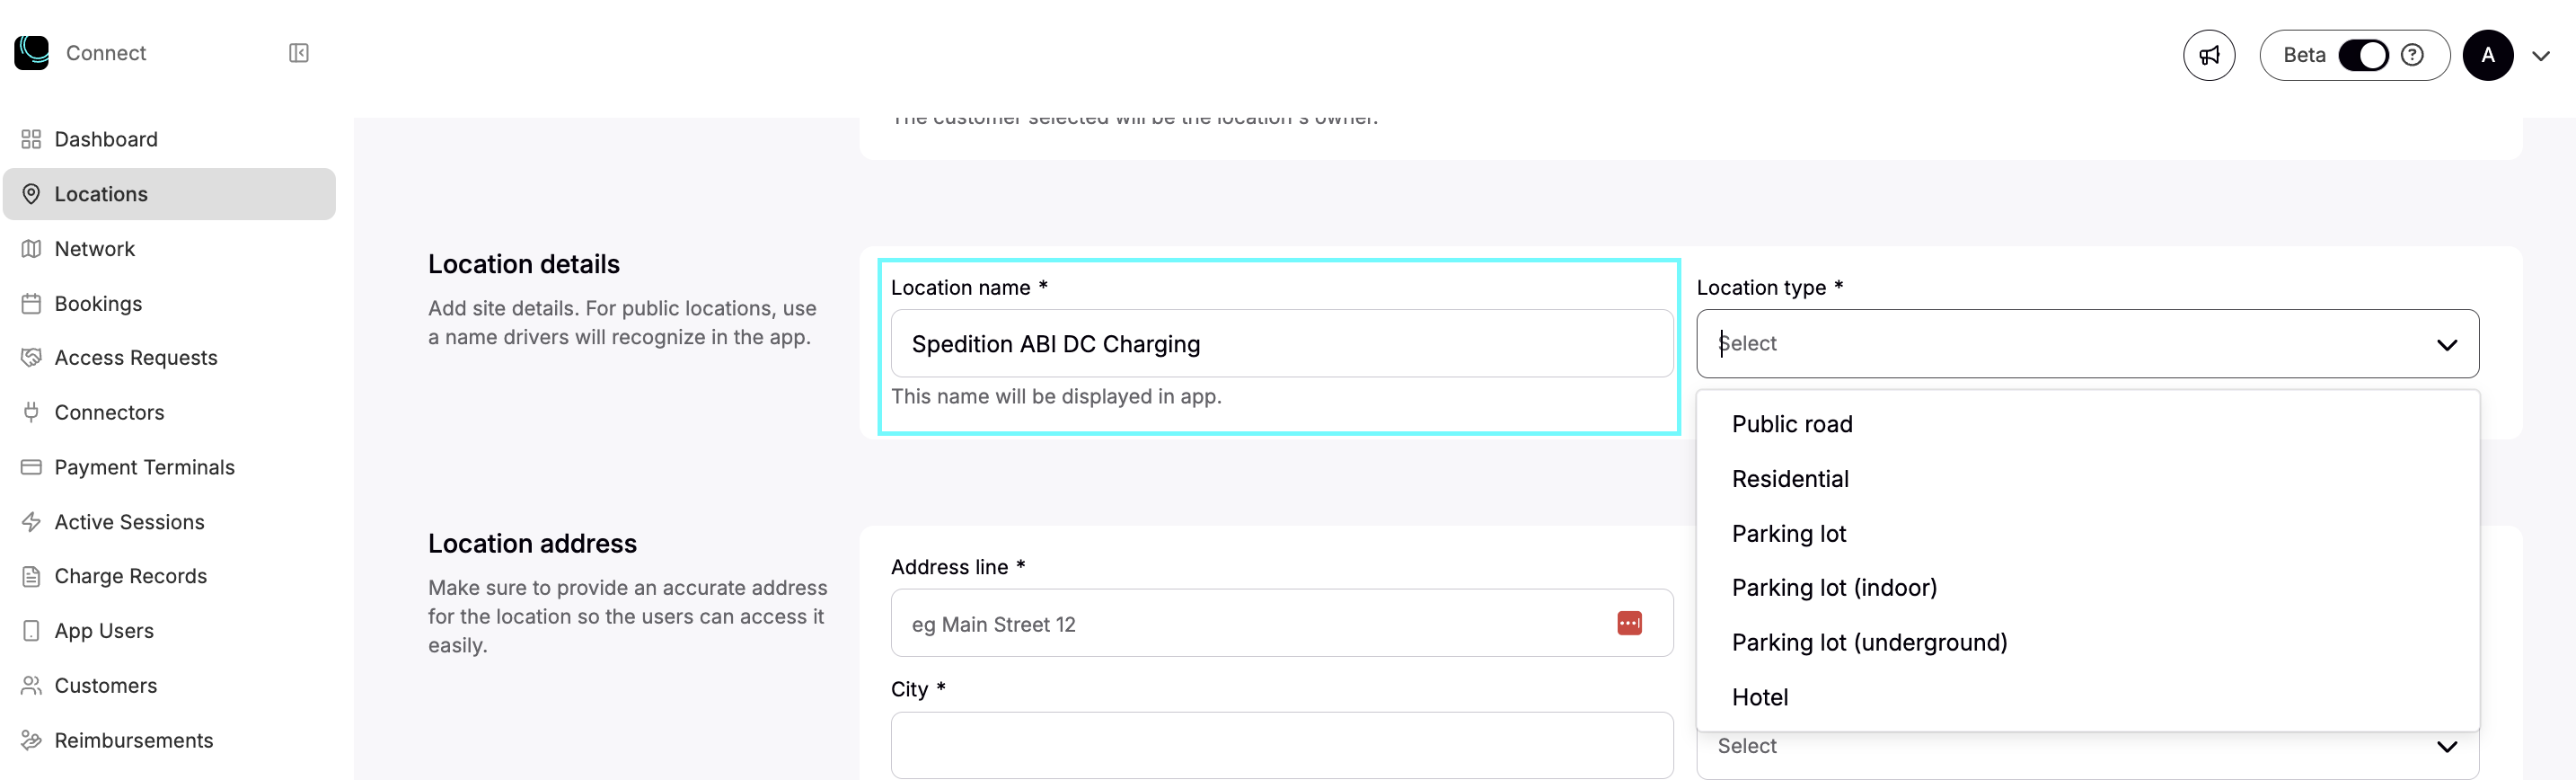
Recommendation
- Use a recognisable depot or site name
- If both AC and DC chargers exist at the same site, consider creating two locations and include the charger type in the name
Example
Spedition ABI – Depot AC ChargingSpedition ABI – Depot DC Charging
Step 3: Select the Location Type
You must select a location type from a predefined list.
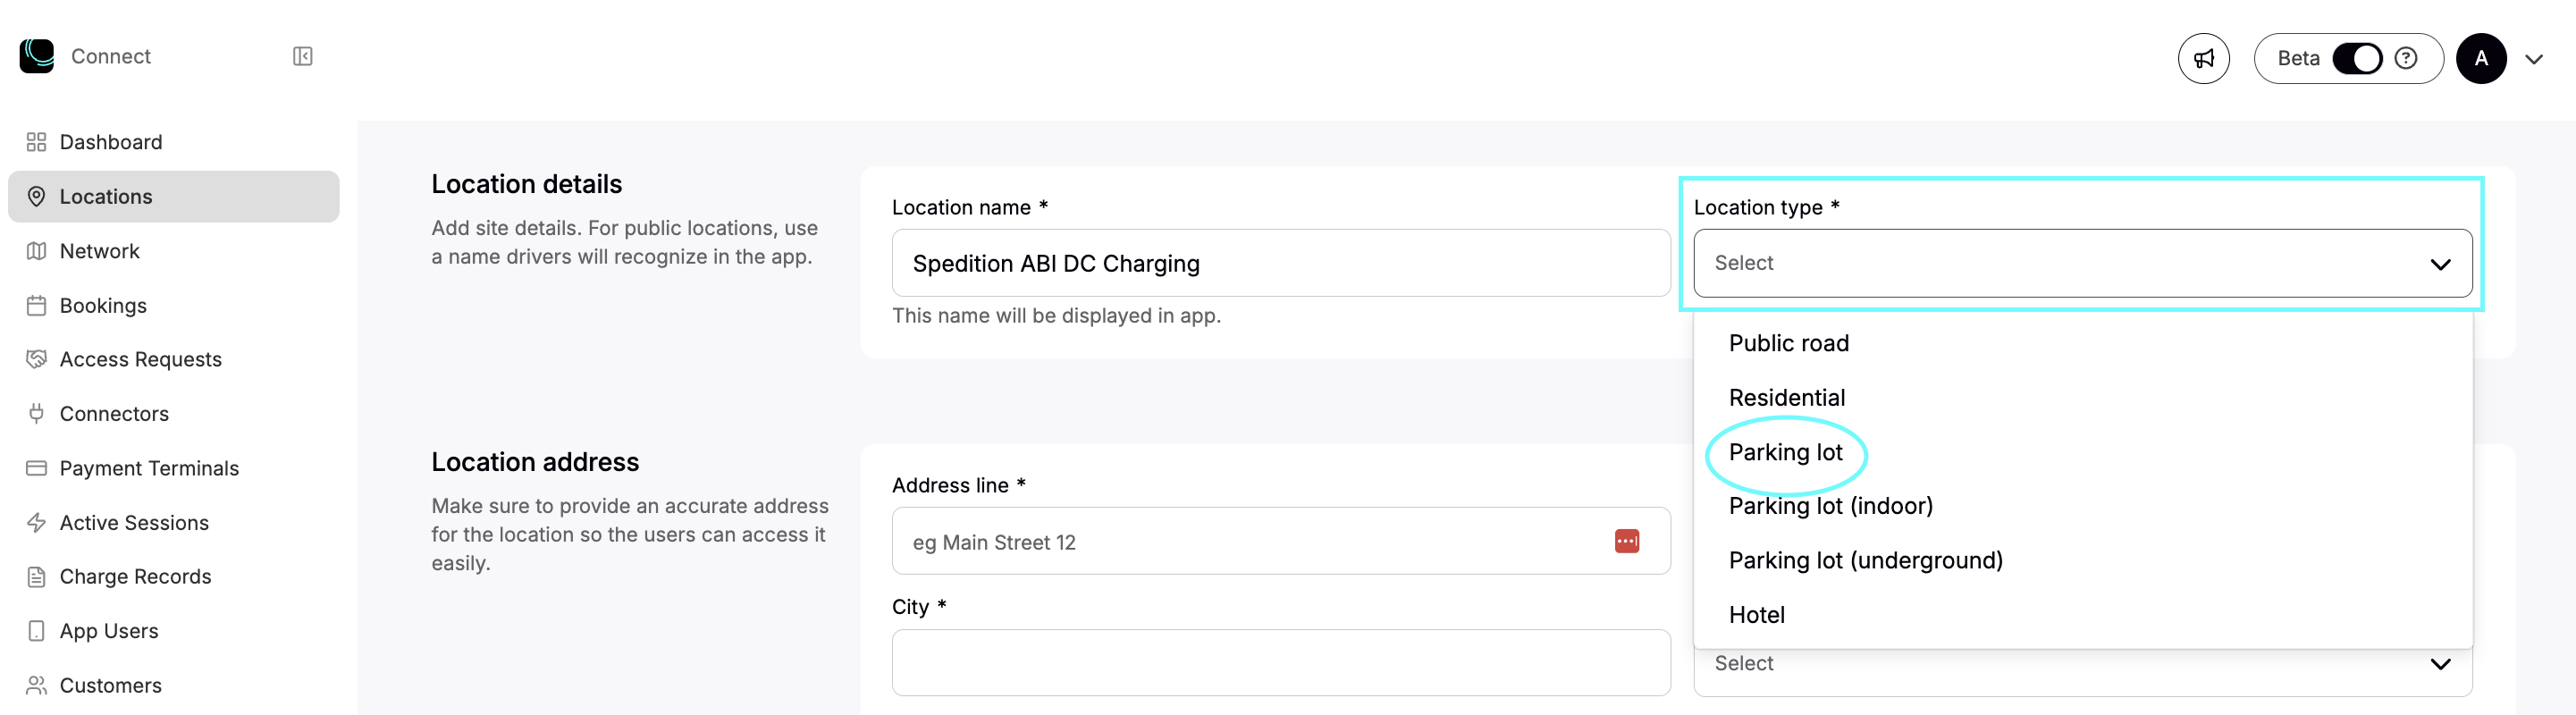
Recommendation
Select Parking Lot for most depot use cases.
Important notes:
- Location type is not visible to drivers
- It is used internally for categorisation in the system
- As long as Residential is not selected, the location can function as private, public, semi-public, or semi-private.
For most depots - even gated or closed sites - Parking Lot is the correct choice.
Step 4: Add the Address and Map Pin
Enter the address of the location.
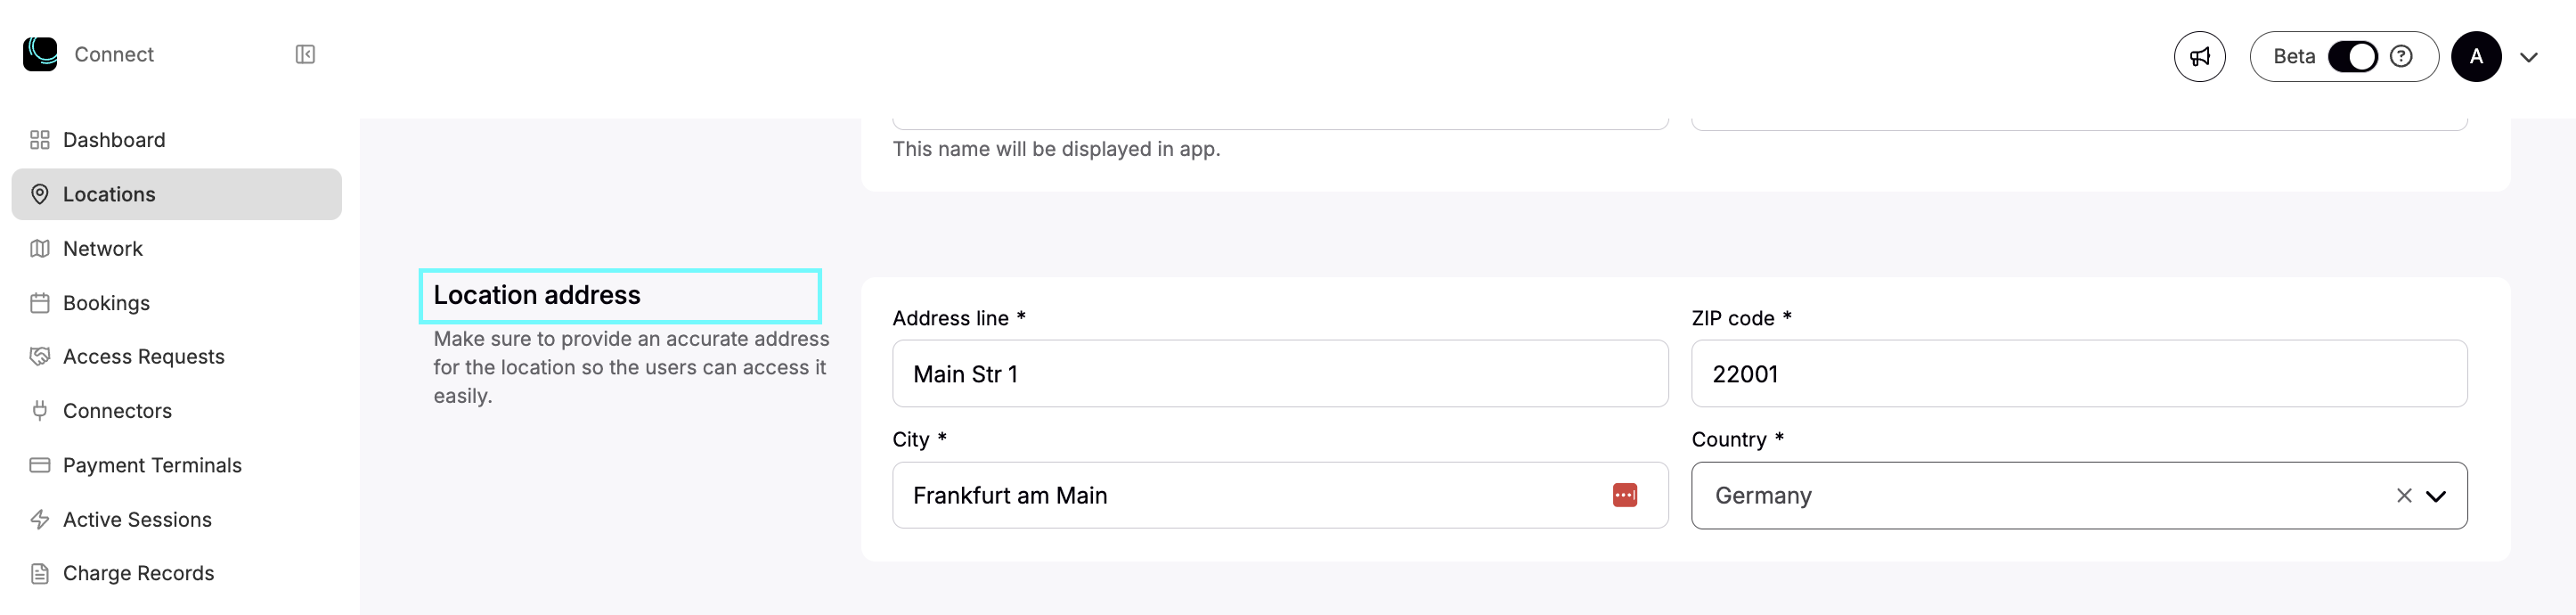
Based on the address:
- The system automatically determines geocoordinates
- A map pin is placed to represent the location
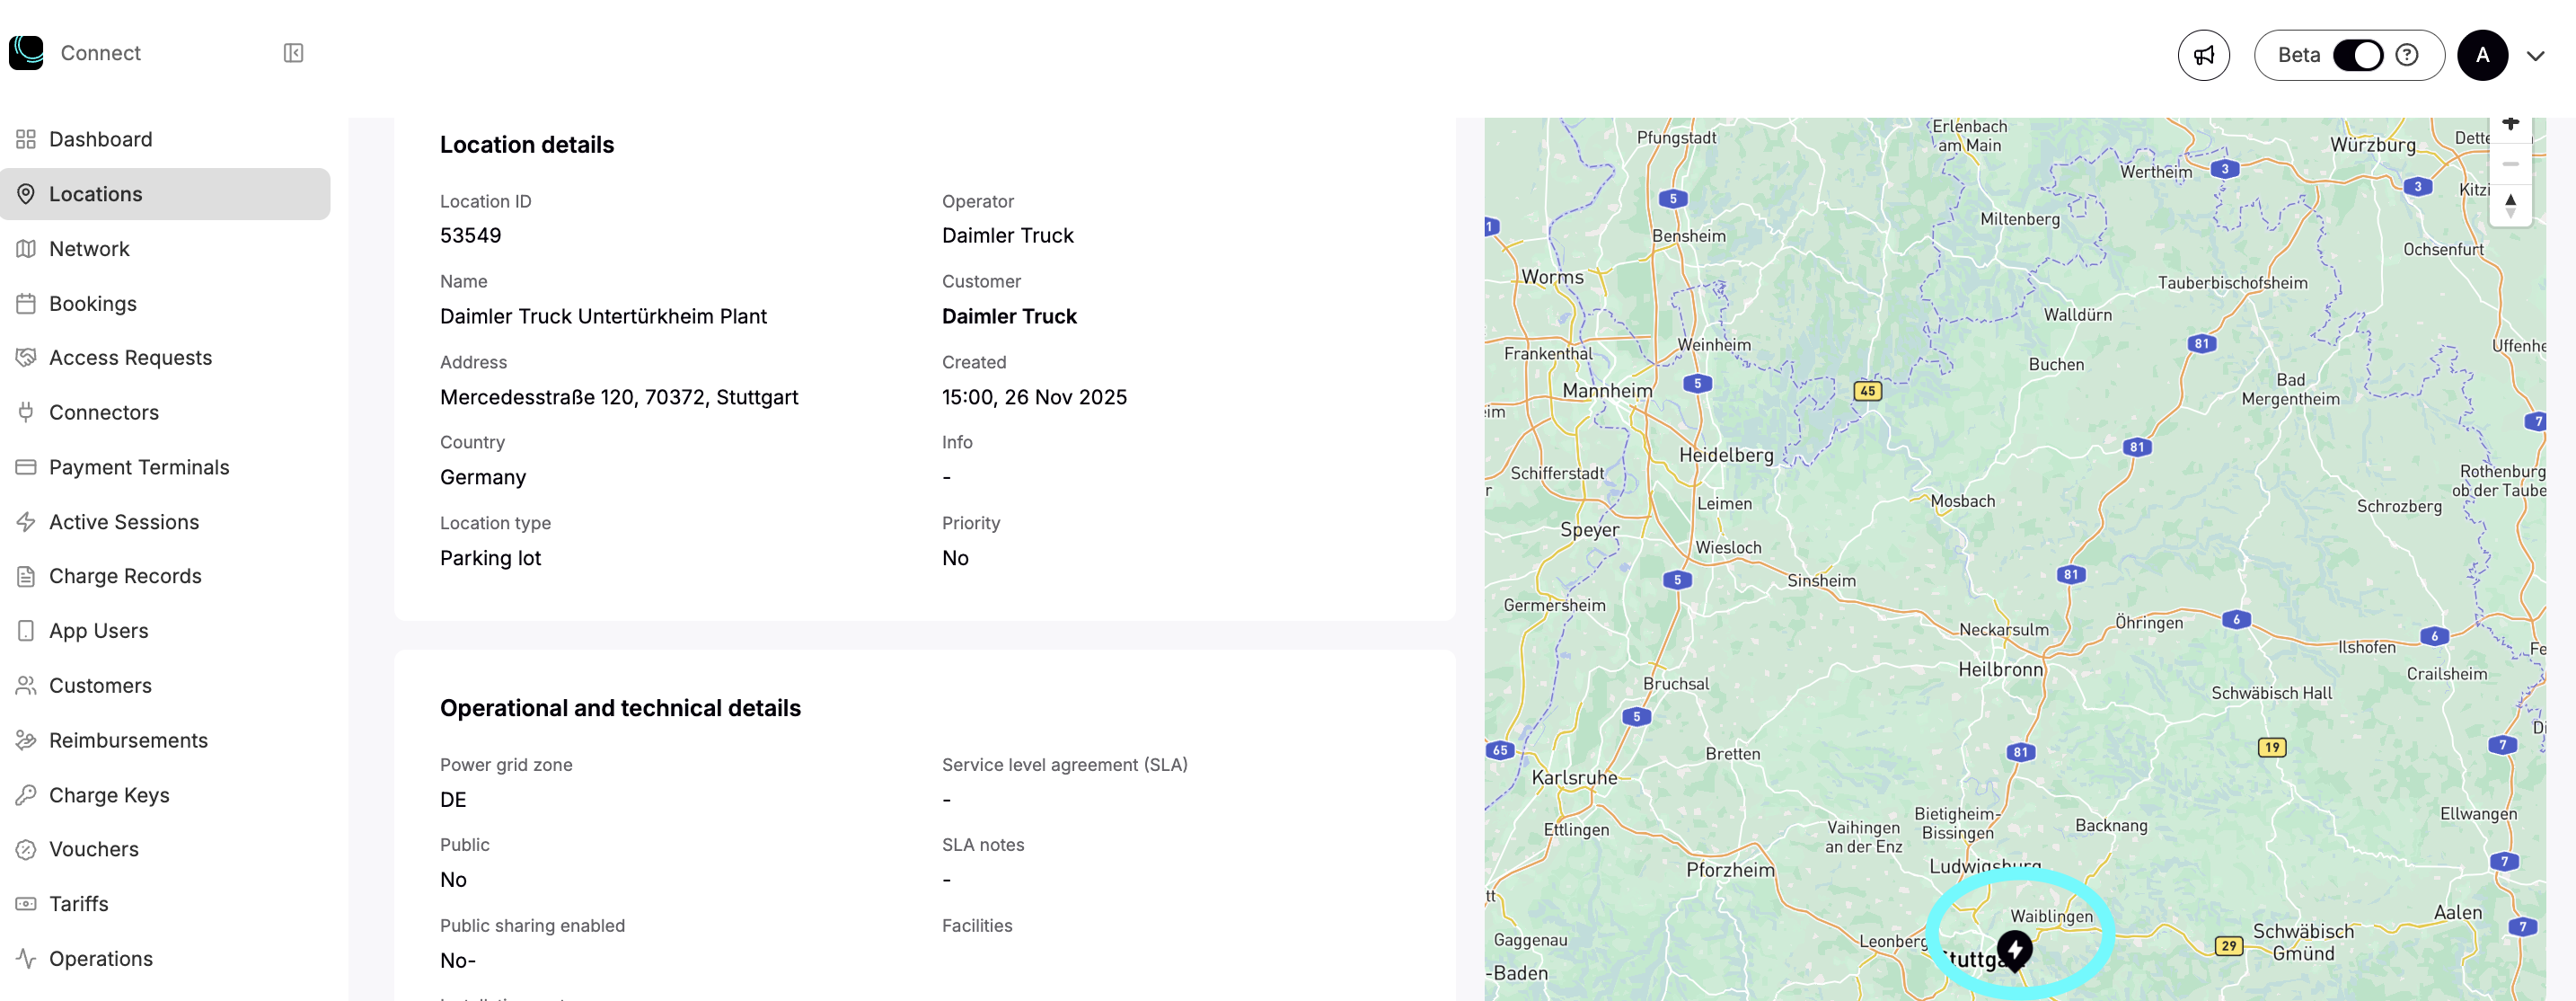
Adjusting the Map Pin
If the pin is not placed accurately:
- Go to "edit" on the location overview
- Unlock pin dragging above the map
- Move the pin to the exact desired position
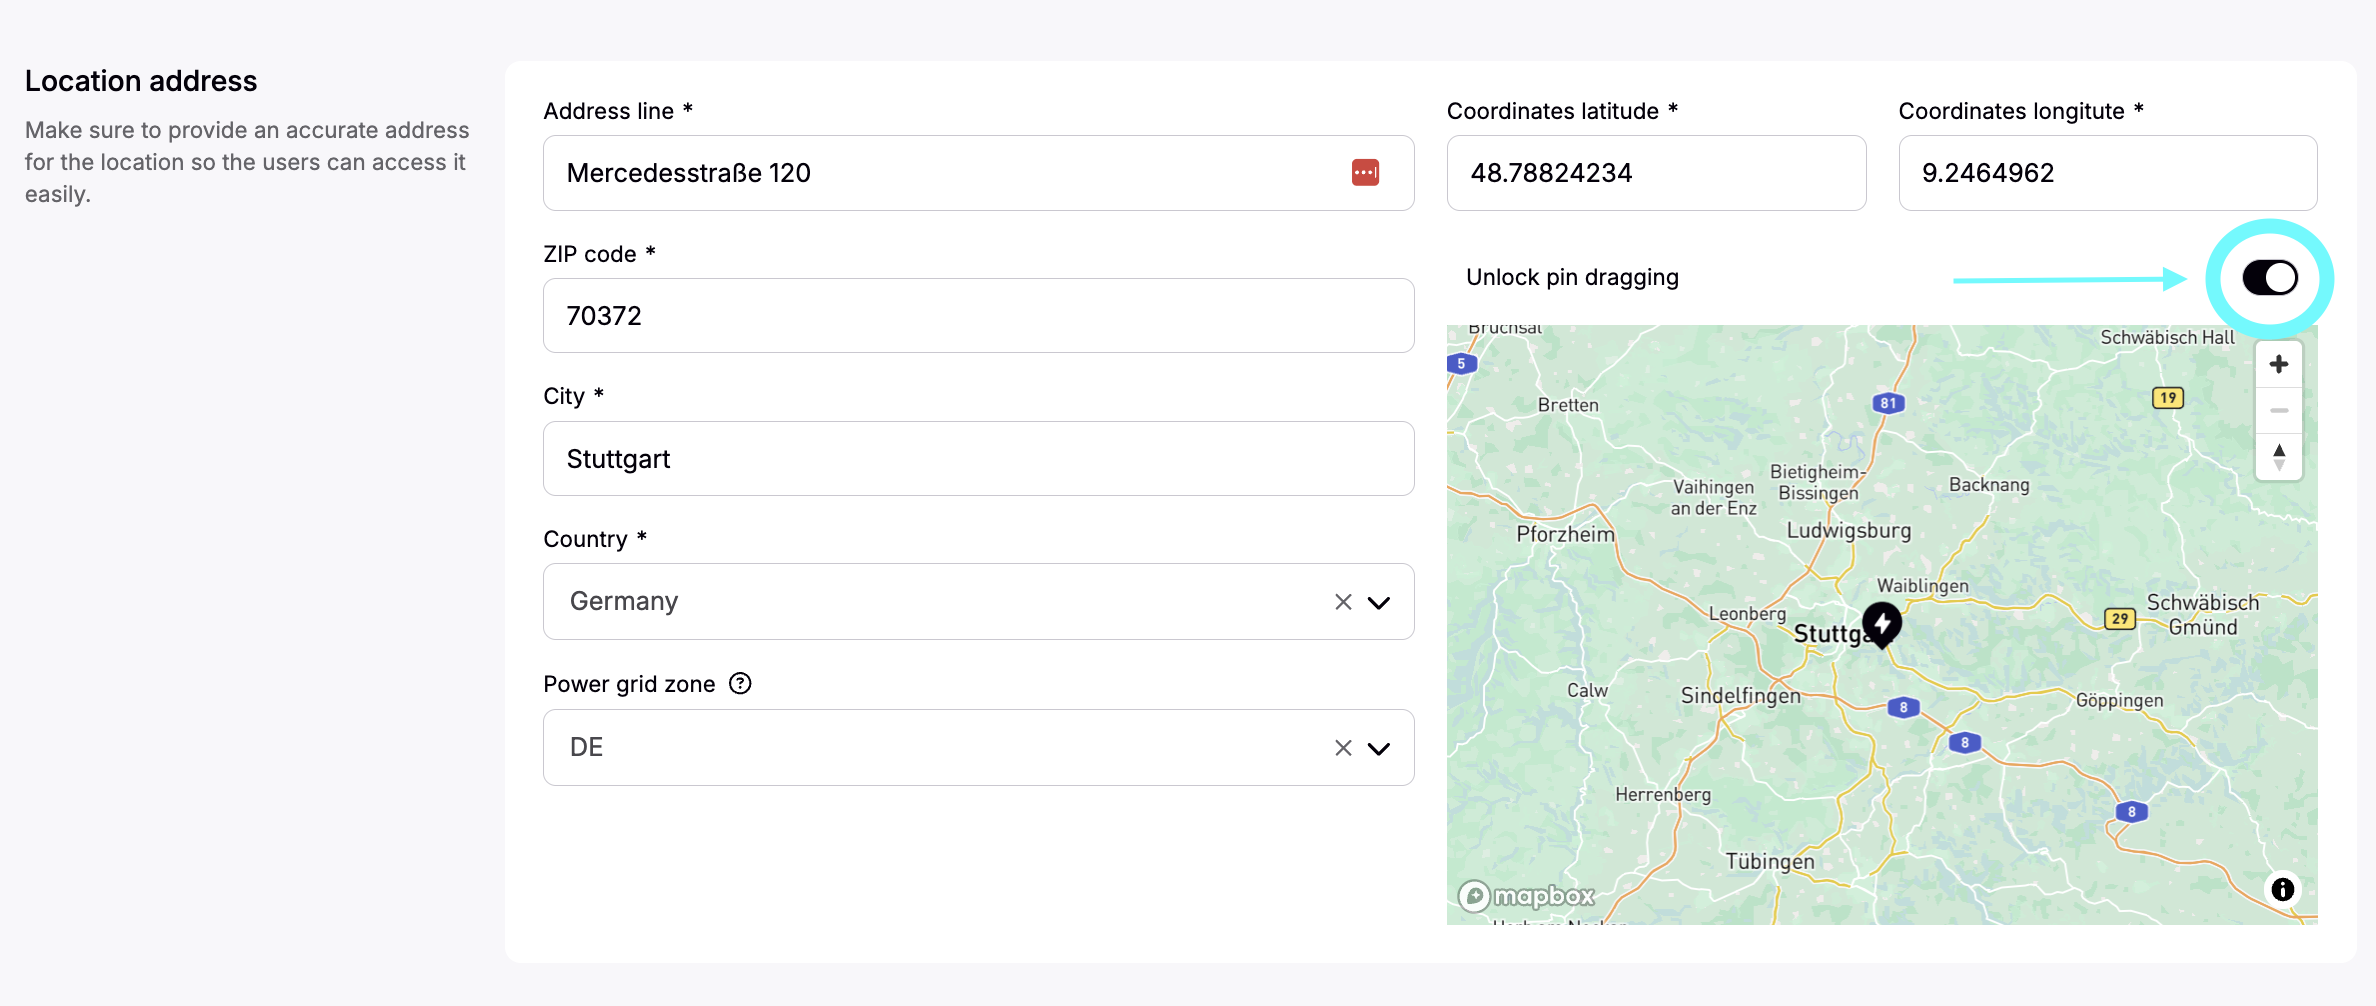
This is especially useful when:
- Chargers are located away from the main address entrance
- Multiple locations share the same address and pins would otherwise overlap
Slightly offsetting pins helps keep locations distinguishable on the map.
Step 5: Financial Agreement (Optional)
The Financial Agreement section can be skipped in most cases.
This is only relevant for charge point operators managing chargers on behalf of third parties. If you are operating your own depot, no configuration is required here.

Step 6: Select Tariffs
You will be asked to select two tariffs (note that the tariffs need to be added prior to this process):
- Tariff
- Legacy Tariff
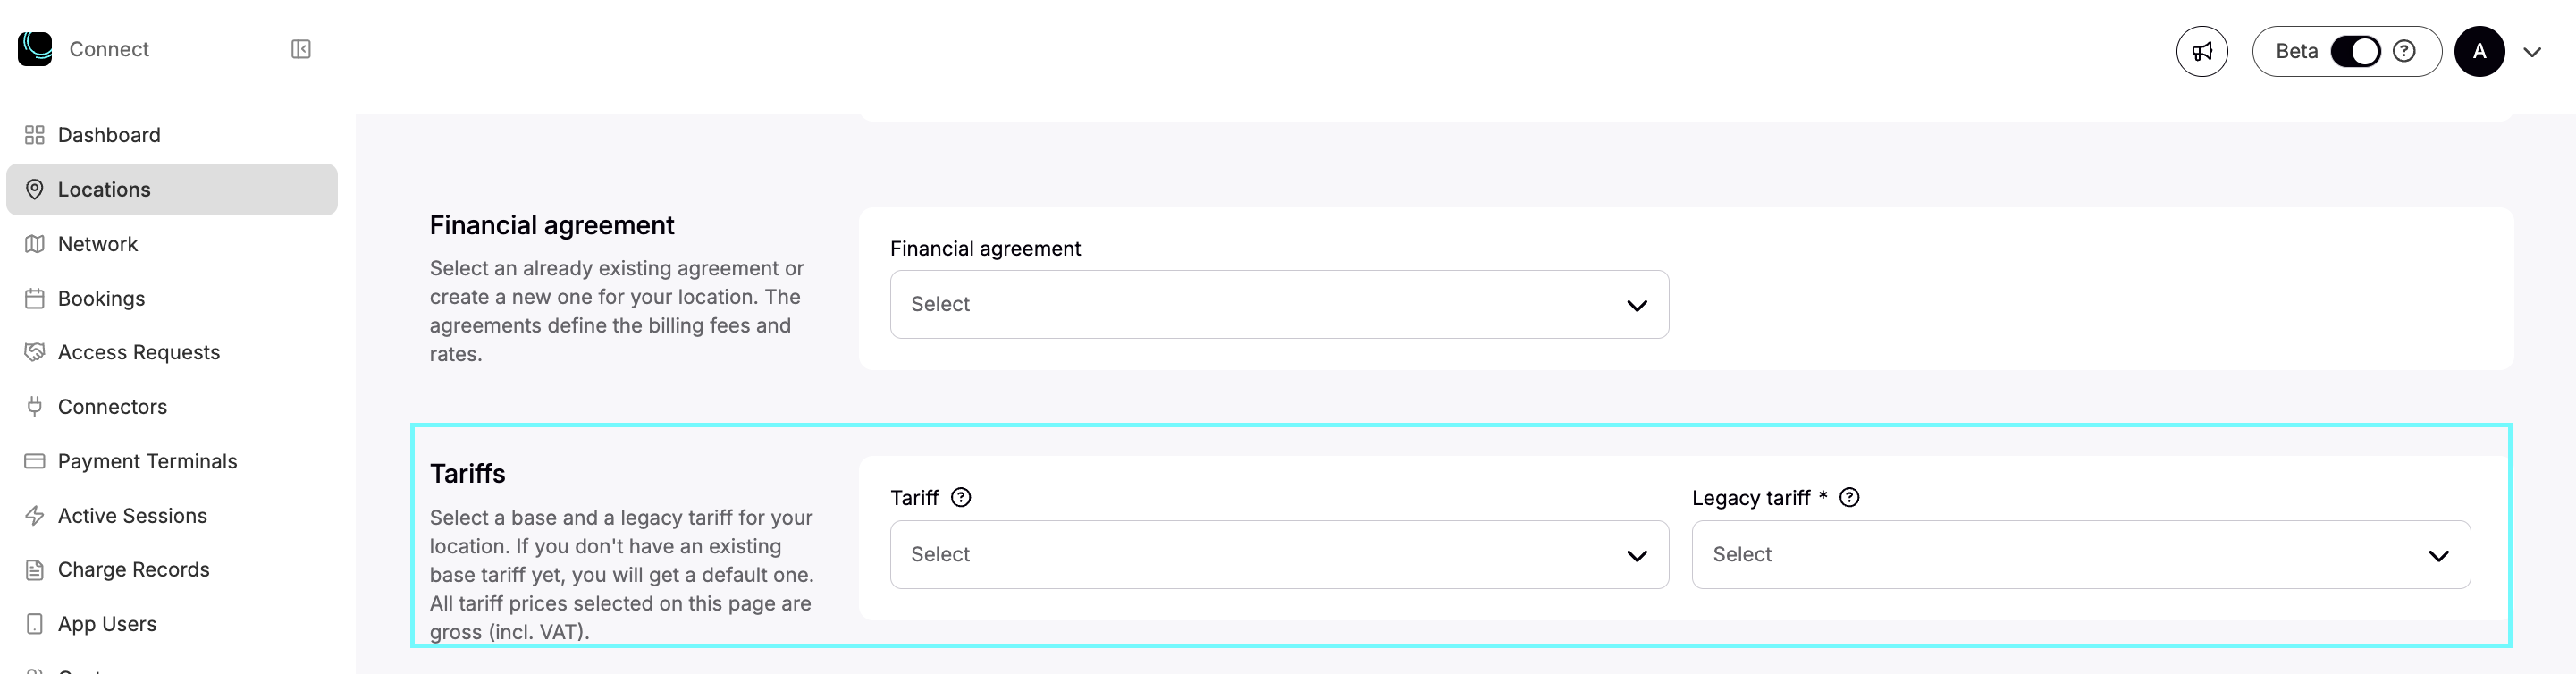
Tariff
This is the primary price applied to charging sessions at the location.
Every location must have a tariff:
- It can be 0 EUR (for internal fleet charging)
- Or a paid tariff (for monetised charging)
Legacy Tariff
This tariff only applies when charging is paid via embedded (non-standalone) credit card terminals.
Step 7: Define Available Facilities
Select the facilities available at the location.
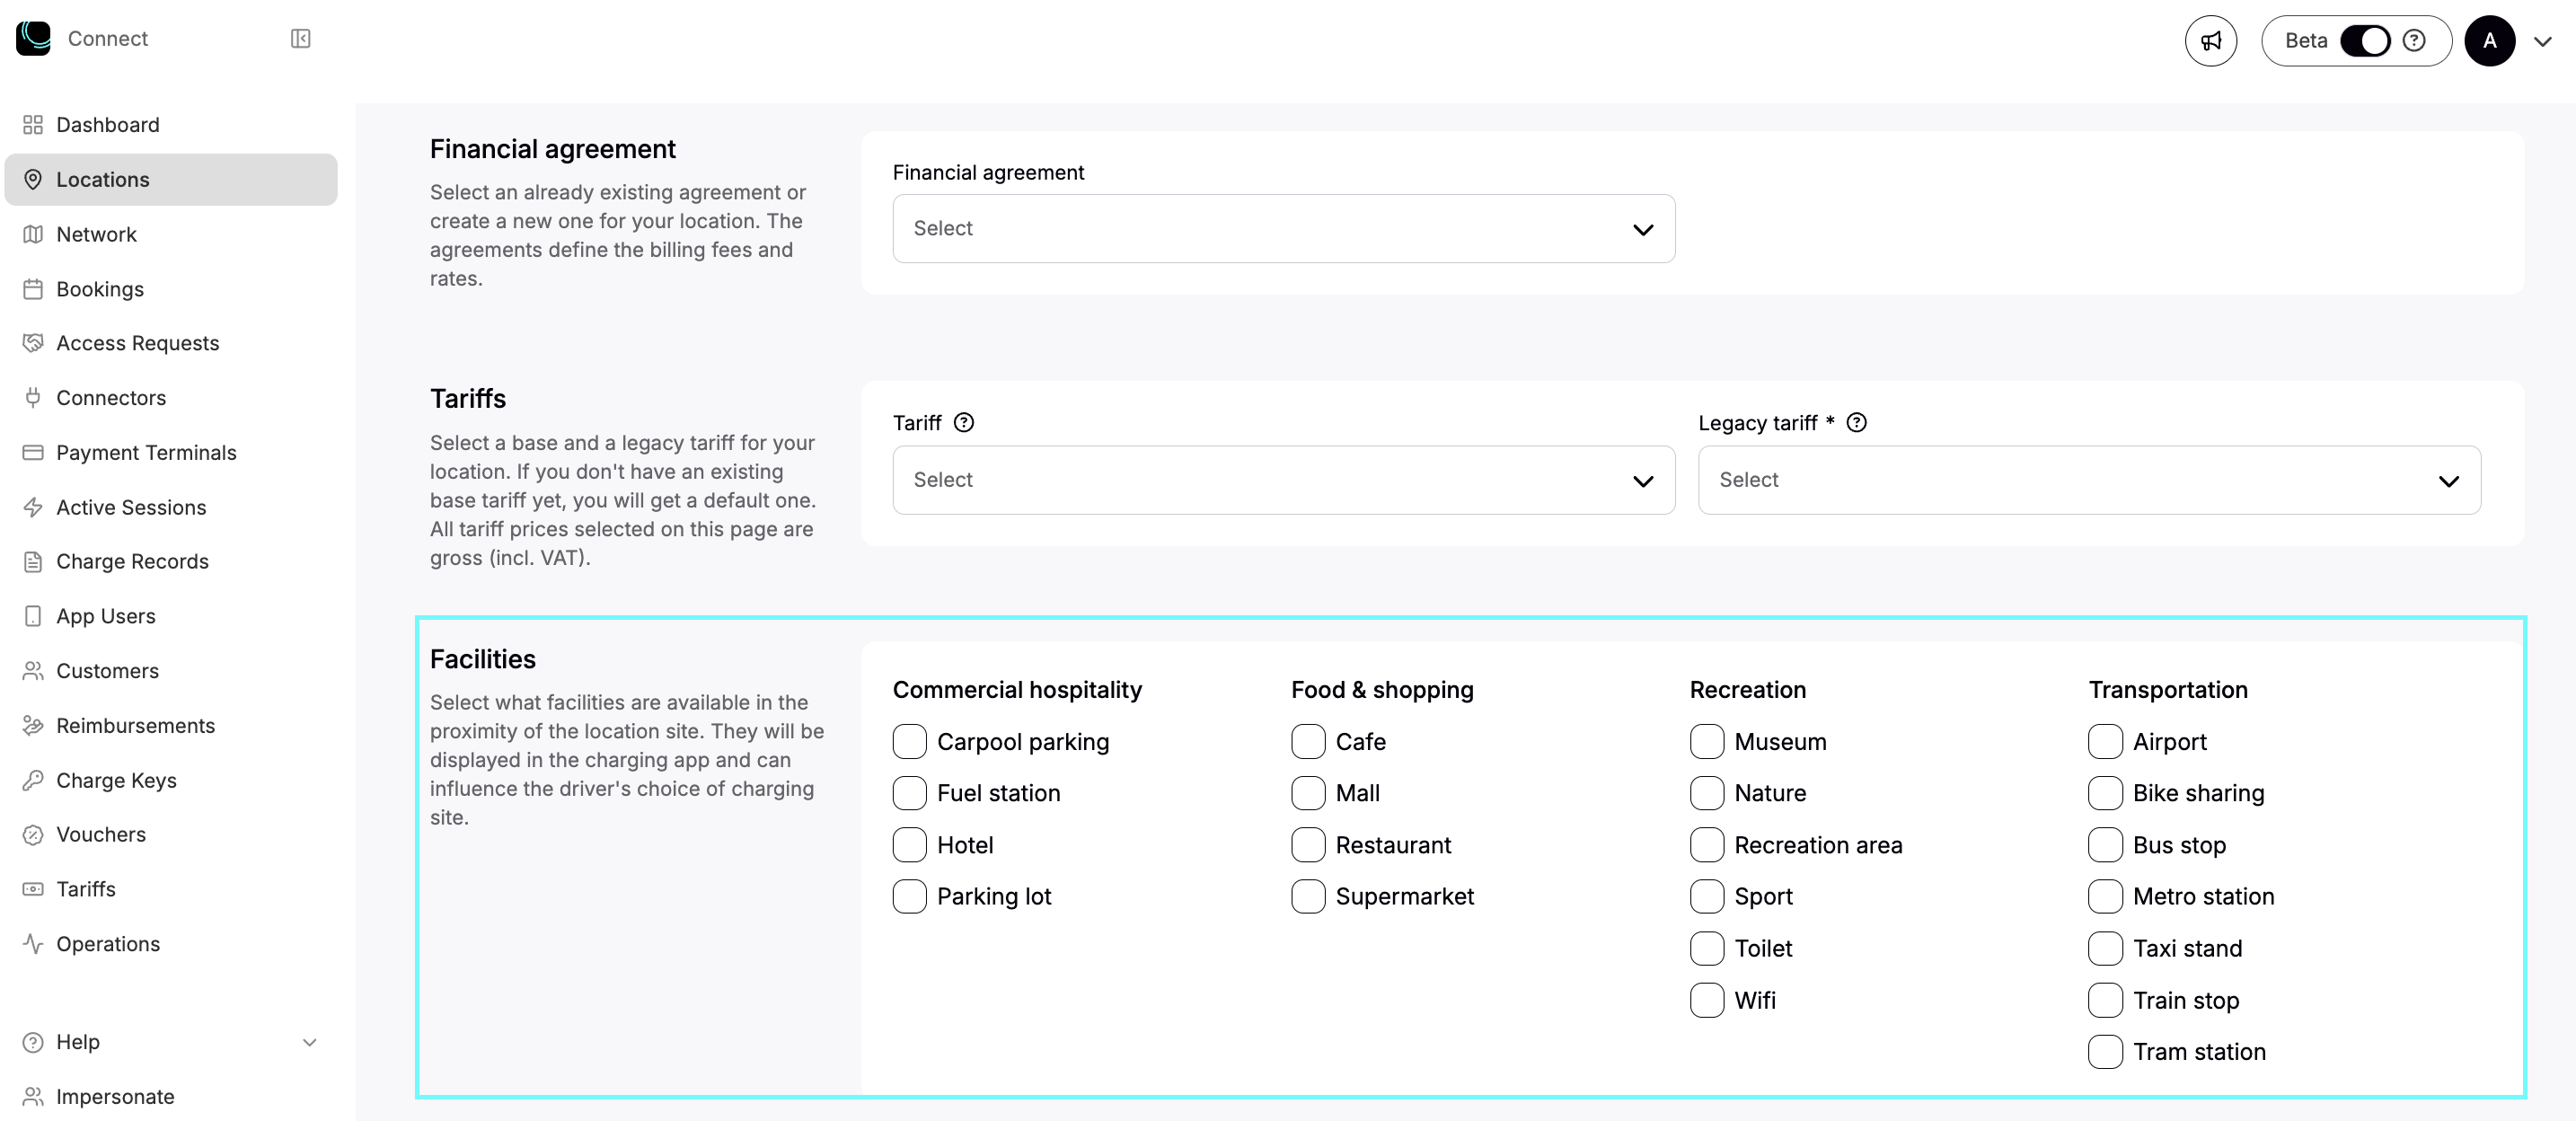
Facilities are:
- Exposed in charging apps
- Shared over roaming protocols
- Used by drivers and fleet managers to assess suitability of a charging location along the route plan
Select only facilities that are actually available on site.
Step 8: Save the Location Shell
Once all required fields are completed, click "Create".
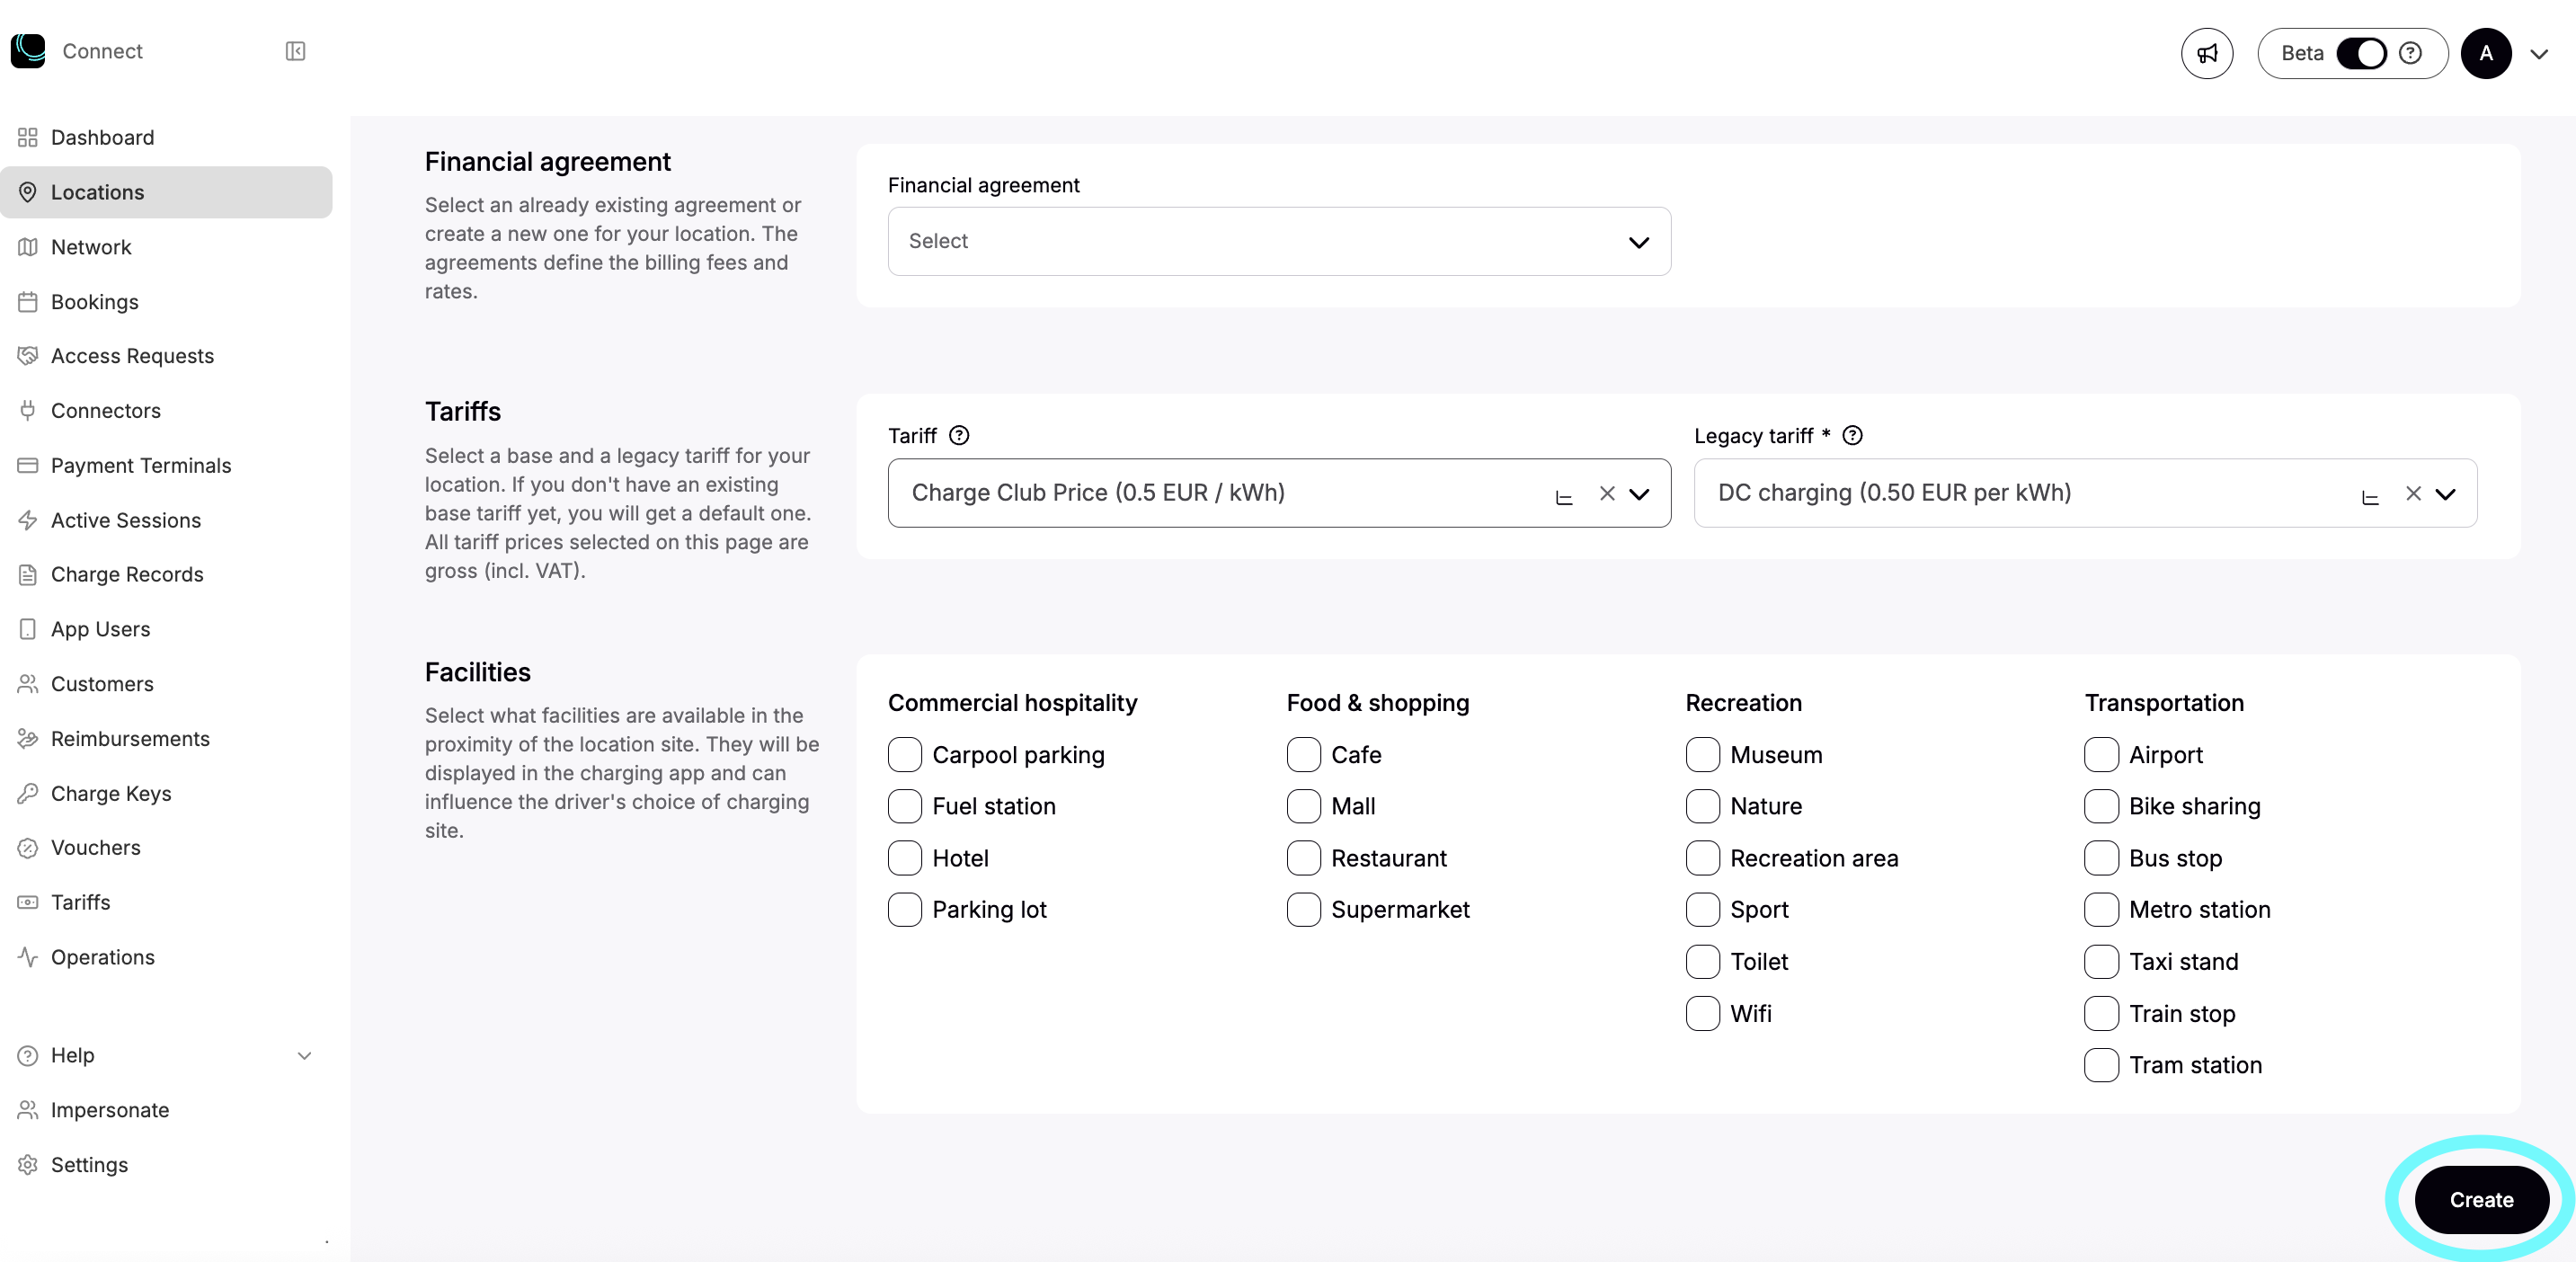
At this point:
- The location exists in the system
- Visibility, access rules, and chargers are not yet configured.
What’s Next
After creating the location shell, you must continue with:
- Defining location visibility (public, private, semi-public, semi-private)
- Configuring access rules
- Adding chargers to the location
These steps determine who can see the site and who can charge.